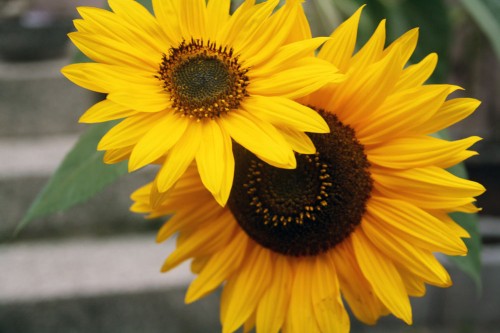
Sunflowers are a favorite of many gardeners and flower lovers alike. I love how they are able to dominate a space in a garden and fill it with color when many other flowers are starting to fall away.
Sunflowers are extremely easy to grow and in fact, I plant to do some guerrilla gardening with them next year. They not only look nice and are resilient — but their heads make an excellent food source for birds as well. In fact, sunflowers will grow well just about anywhere with sufficient sun and good soil.
If you are thinking about growing sunflowers and have a few growing in your garden already, or know where some are growing while, harvesting the seeds is a great way to ensure you have seeds for next year and it’s a super simple task. You just have to know when the right time is and master the art of drying so that you can easily remove the seeds. Why do you have to dry the before harvesting? Harvesting the seeds when they aren’t dry yet can be difficult. To make things easier to do, you simply have to dry them up.
Tips for harvesting sunflower seeds
Signs of readiness
The easiest sign which tells you your sunflower seeds are ready for harvest is when the head becomes brown and dry, as if the flower has wilted and is dying. You will also notice that most of the yellow petals have dropped off and you’re left with the bare seed head. Although it might look like the flower is dead and you’re too late to the game, if you look closely and you will see that the middle of the head of the sunflower will still be moist. You can actually eat the fresh seeds immediate if you want, but it’s a whole lot easier to get them off the head when they are dry.
There are two options for harvesting sunflower seeds: drying on the stem and early harvesting.
Drying (On the Stem)
The drying of the sunflower can occur naturally and on its stem. With this technique, what you need to be watching for is the head of the sunflower turning yellow and all the petals have fallen off. When you see this happening, you’ll want to act quickly to make sure you don’t lose any seeds to animals or the ground. Cover the head with a brown paper bag (not plastic) which will let the flower head still breath and keeps it from getting too moist. If it rains, replace the bag immediately.
When the head turns brown on the backside, this is your indication that the seeds are dry and ready to be harvested. Simply cut the sunflower off one foot down the stem while making sure that the paper bag remains covering the top so you don’t drop any seeds.
Drying (Early Harvesting)
If you do not want to have to deal with other animals that are waiting on the seeds just as you are, there is another technique to dry and harvest the sunflowers. When the backside of the sunflower head turns yellow, you can simply cut the head off, leaving only a foot of the stem below the head. Then, you have the freedom to dry the seeds wherever works best for you. Just make sure your drying location is warm, dry and has good ventilation because the last thing you want is moldy seeds If you are concerned about dropping any seeds or unwanted animals coming after the seeds in your drying space, you can still cover the head with a paper bag and dry them the same as above, until the back of the head has turned brown.
Harvesting
Once the heads are dry, you can easily harvest the seeds by running your hand over them. The seeds should pop right out into your hands. Or you can hold the head upside down over a bucket or bag and use your finger to flick them out. You may end up with some extra plant material with your seeds, but if you are just planning to plant them out, it’s not a real concern.
With the giant sunflowers, you’ll end up with hundreds of seeds from one flower — far more than you’d probably want to plant in your own yard. But you can also spread them along a path where you walk in the spring, or in an esplanade in the middle of a street which you know doesn’t get mowed often to start your own little guerrilla gardening movement. 😉
Store your seeds in a cool dry place. If you shell the sunflower seeds, you can actually store them for several months in an airtight container in your fridge or freezer.
Roasting
If you’d like to eat a few of these delicious seeds you just harvested, you’ll first want to shell the seeds and put a single layer of the raw seeds in a shallow roasting pan. Roast the sunflower seeds in 300°F oven for 30-40 minutes, or until the seeds are brown and crisp. Stir them from time to time to keep them from burning. Once roasted, you can remove them from the oven and coat them in margarine. About 1 teaspoon of margarine per cup of seeds will work. Then salt to taste.
Featured Posts from Last Week’s Natural Life Linky
Ever wanted to try growing your own garlic? Like growing onions, garlic is super easy — and I’m pretty sure you could even do it in a container somewhere inconspicuous. Ok, I need to find myself some garlic starters and at least grow garlic on my balcony for next year! Check out this post on Fresh Eggs Daily to learn more.
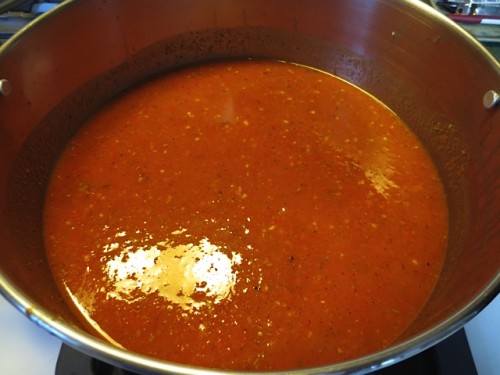
How about making your own oven roasted tomato sauce as the perfect basis for your homemade pizzas? I am definitely going to have to try this, because the base sauce you use can make all the difference — and this one sounds delicious!
Want to join in the fun and link to your own blog? You can share about anything related to natural living, from gardening to recipes to home remedies to anything else related to natural living.
Here’s how this works:
PLEASE READ THESE GUIDELINES, especially if you have never linked up before!
Posts you might want to link up could include:
- Green & natural living
- Real Food recipes
- Repurposing & upcycling ideas and projects
- Home remedies & aromatherapy
- Gardening goodness
- Sustainable smartness
- And other things related to living a more natural life
Here’s how this works:
- You are free to join the Natural Living link up at any time. You can also skip a few weeks and then come back. It’s entirely up to you.
- Please do not share more than 2 links per Link-up. If you do, I will delete the “extras.”
- Please link directly to the specific post on your blog that relates to green living — not your main blog URL.
- Please only link to your own blog or photos hosted online.
- Link back to No Ordinary Homestead or the Natural Living link up post in your blog post. This way, if someone else wants to join the fun, they can. You can either link with text or using the Natural Living badge. Below is a code for the badge above – feel free to resize it as you need. Just copy and paste this code into your post or save and upload the image to your blog: <a href=”https://www.noordinaryhomestead.com/category/natural-living/natural-living-link-up/“><img title=”natural living link up″ src=”https://www.noordinaryhomestead.com/wp-content/uploads/2012/08/noh-natural-living-linky.jpg” alt=”natural living link up” width=”300″ /></a>
- I highly encourage you to visit other participants and leave comments. This is a great way to meet new friends and become inspired about your garden! I try to visit all the blogs participating as well every week

That’s it! Share your green ideas with us by linking up at the bottom of this week’s Natural Living post!
That’s it! Share your garden with us by linking up below!


Thanks for featuring my Oven Roasted Tomato Sauce! It’s my favorite way to preserve my tomatoes! Thanks for hosting and have a wonderful weekend!