After posting new photos of the seedlings, some were asking about the newspaper pots I use. They are completely free (aside from the soil we buy to fill them with although one could use their own soil and compost) because I use papers that come to our house every week for free. We get an insane amount of junk mail here. About two inches thick every week. A lot of it is slick fliers which can’t be used but about 30 pages is just local newspapers. That’s 30 pots a week.
I have been making my own newspaper pots for about a year now. If I didn’t want to make myself so insane, I might just make a few every week throughout the year. Then I could store them up for planting time. Instead I wait until the time comes and make about 10-20 pots a night. It really does get monotonous and boring. But sometimes I can talk Stefan into doing the first part of the folding (in half three times) and then I do the rest.
I store them in groups of 10, using of the pots to hold 9 folded pots. This keeps them from opening up before I use them and I can quickly see how many pots I have ready for planting already.
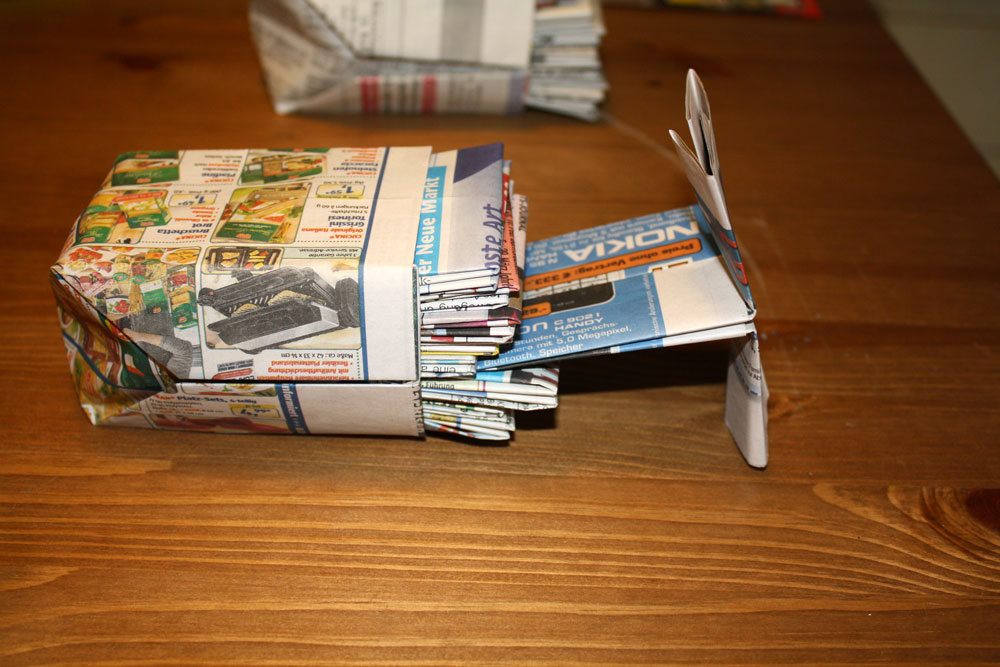
The free newspapers here in Germany have various sizes and a single half-sheet that I use for folding may have one of the following measurements: 35 x 51cm (about 14 x 20 in) or 40 x 57cm (16 x 22.5in). The majority of the paper is 35×51 but the bigger pieces make slightly larger pots which are great for planting multiple seeds or larger plants like zucchini, pumpkins, squashes, etc.
There are other ways of making newspaper pots, some involving a bottle or a special device you buy. I prefer this origami style that doesn’t use any tape or staples to hold them together. Then I can just drop the whole pot into the ground if I need to. Sometimes the roots will grow right through the pots so you don’t even have to worry about damaging them. But they do take a little while to break down. On the other hand, they hold up remarkably well for seedlings and I have had no trouble with them falling apart. You definitely should put them in a tray or on plastic, though, as they tend to leak.
I’ve made a little video to show you how it works. I think it’s far easier to understand than a written version with photos…but you can find that below the video as well if you prefer.
Happy planting and hope you have a beautiful harvest!
How to Fold Your Own Newspaper Pots
TIP: I use a pen or pencil on each crease as I make the pots to make the folds really firm. I find it helps during the process and doesn’t get my hands quite as dirty.
- Start with half a sheet of newspaper.
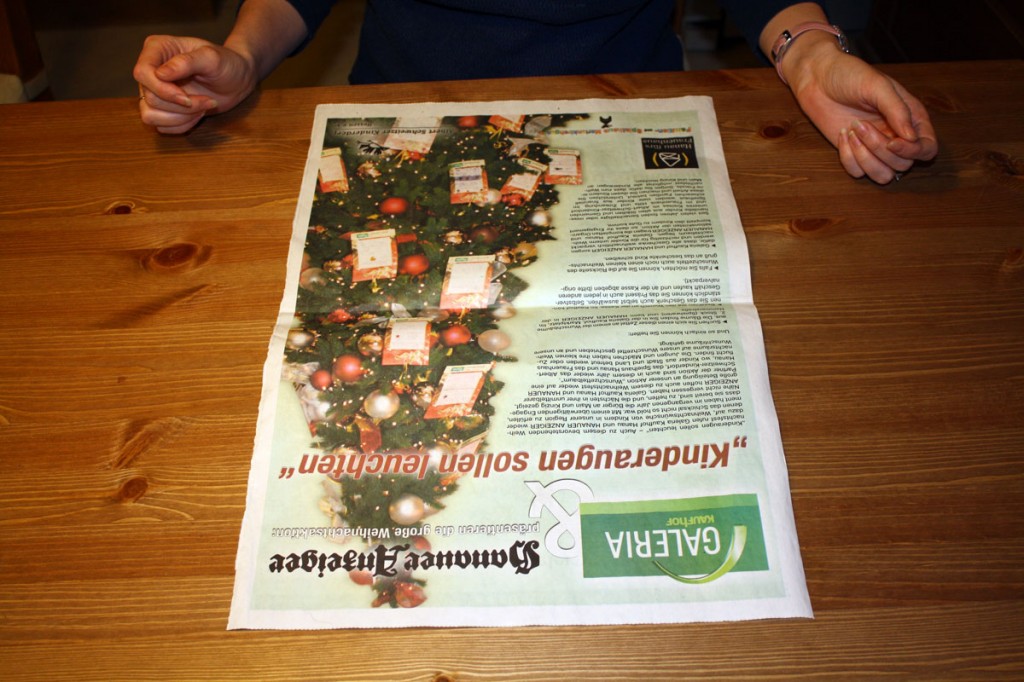
- Fold it in half from bottom to top.
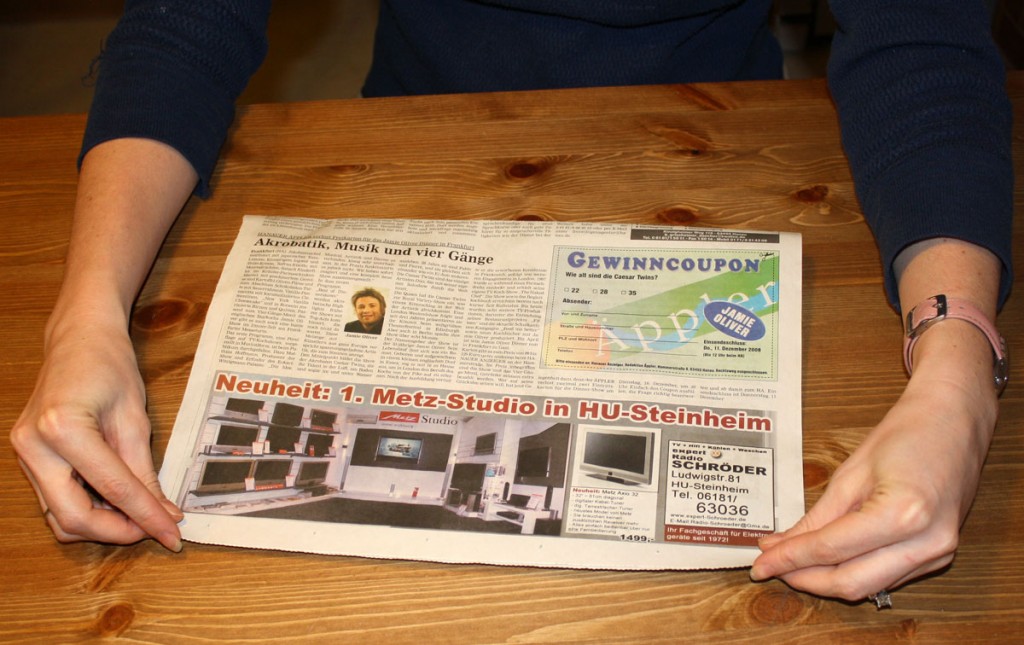
- Then fold it in half again, from left to right.
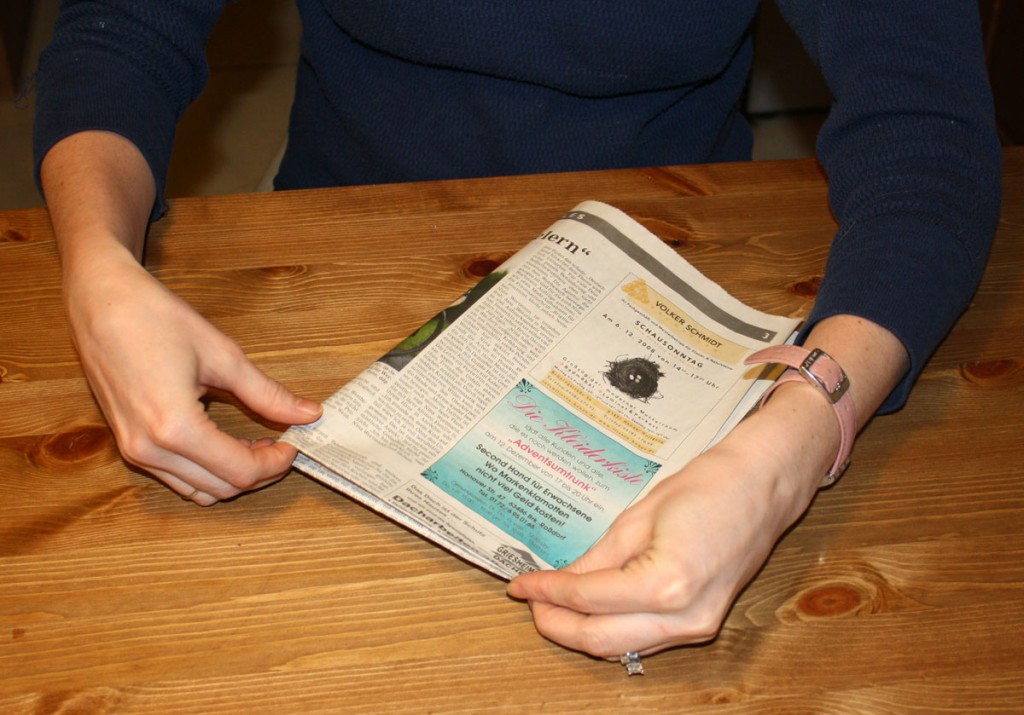
- Fold it in half a final time from left to right. This will serve as a marker for later folds. You can unfold it again.
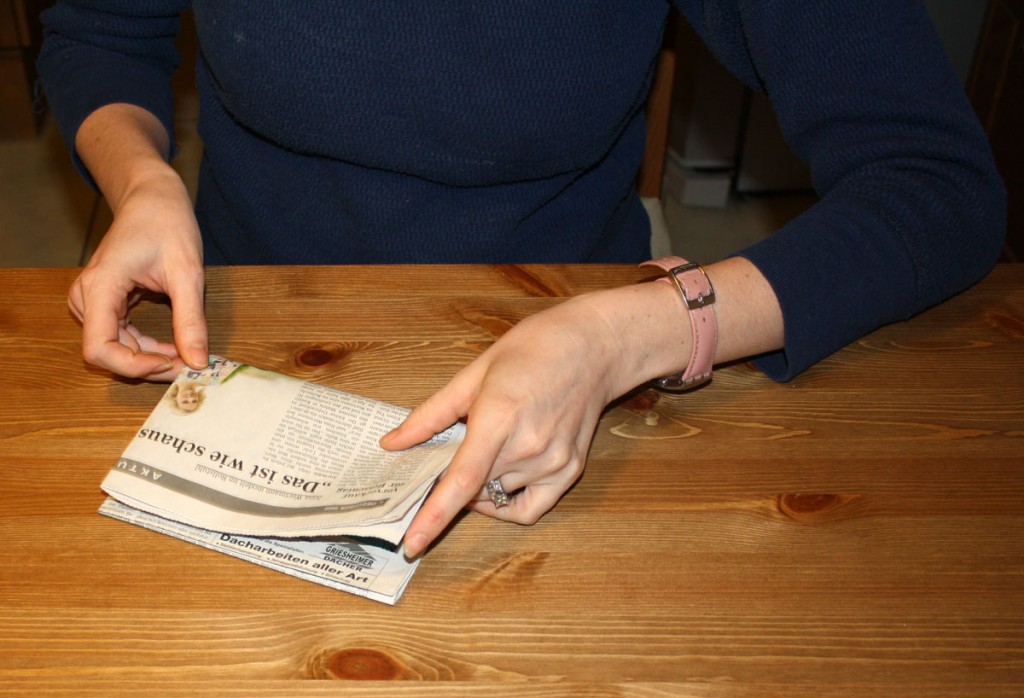
- Lay the paper lengthwise in front of you with all the loose edges facing away from you. Take the right corner of the newspaper and fold it to the center. The line you folded in the last step will serve as a marker.
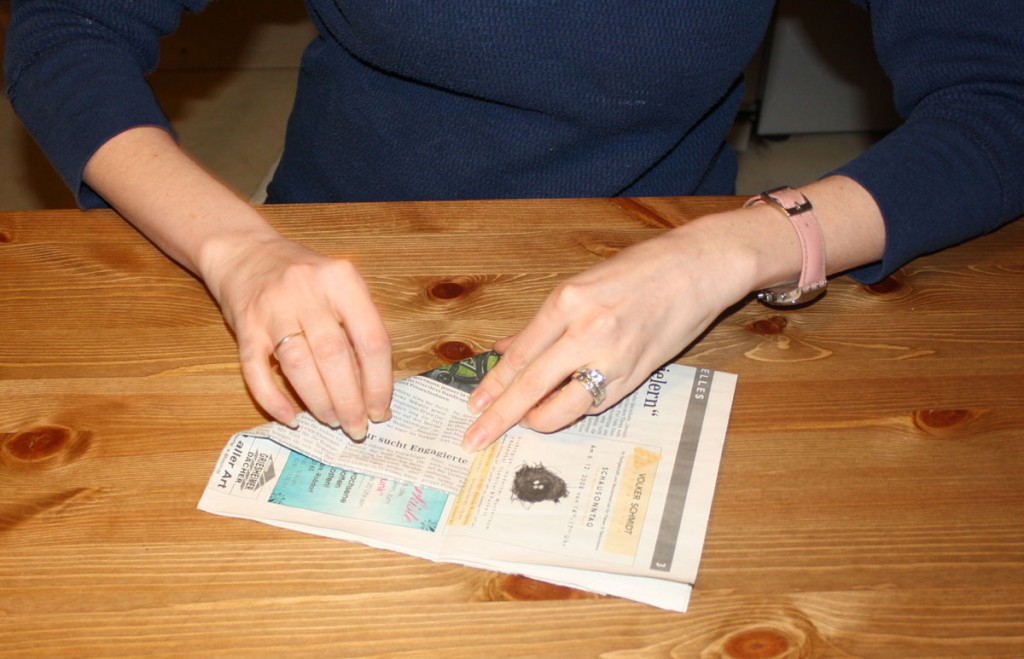
- Now take the corner and open the triangle, pulling the lower right corner to the left. Line up the middle fold of the now top piece with the edge of the newspaper below it. You will have the shape below which slightly resembles a newspaper hat.
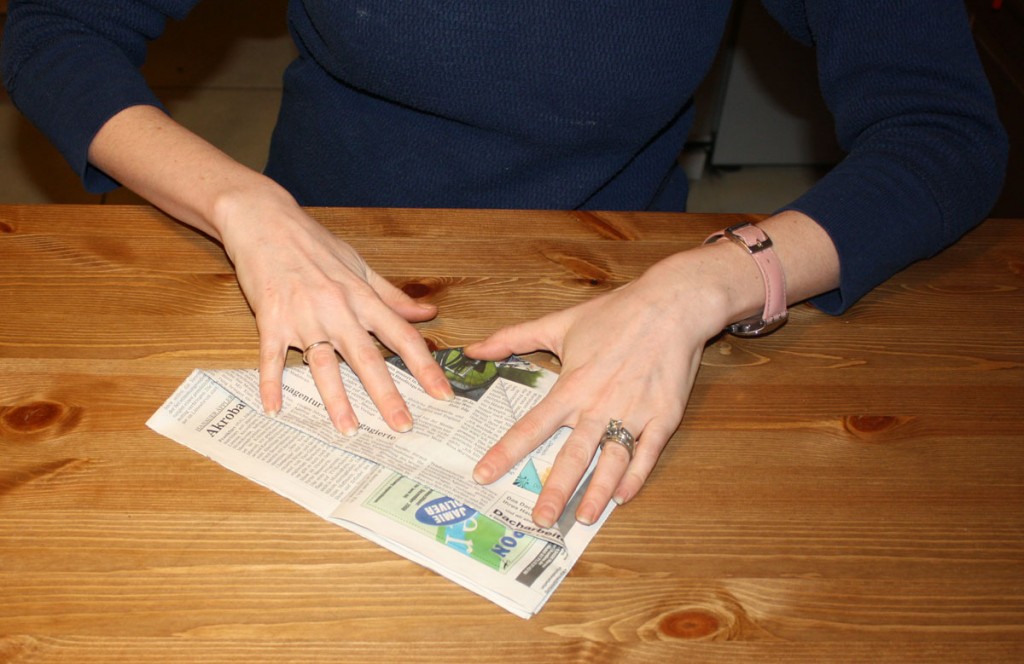
- Flip the paper over and repeat the process.
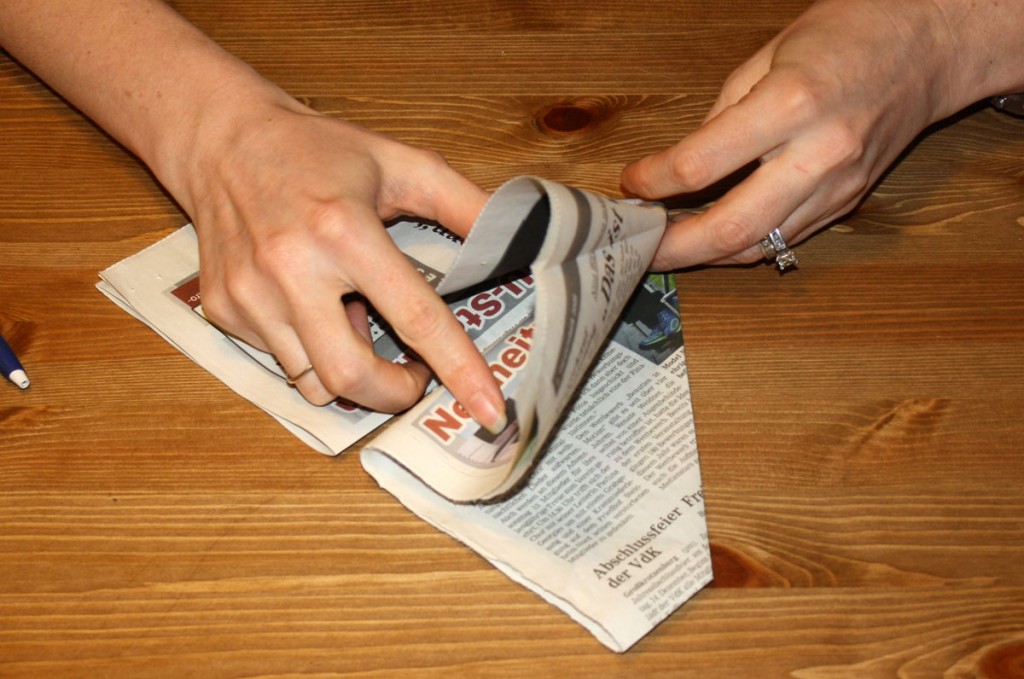
- Once you’ve got the sides folded and lining up, you need to flip the folds so the insides become the outsides.
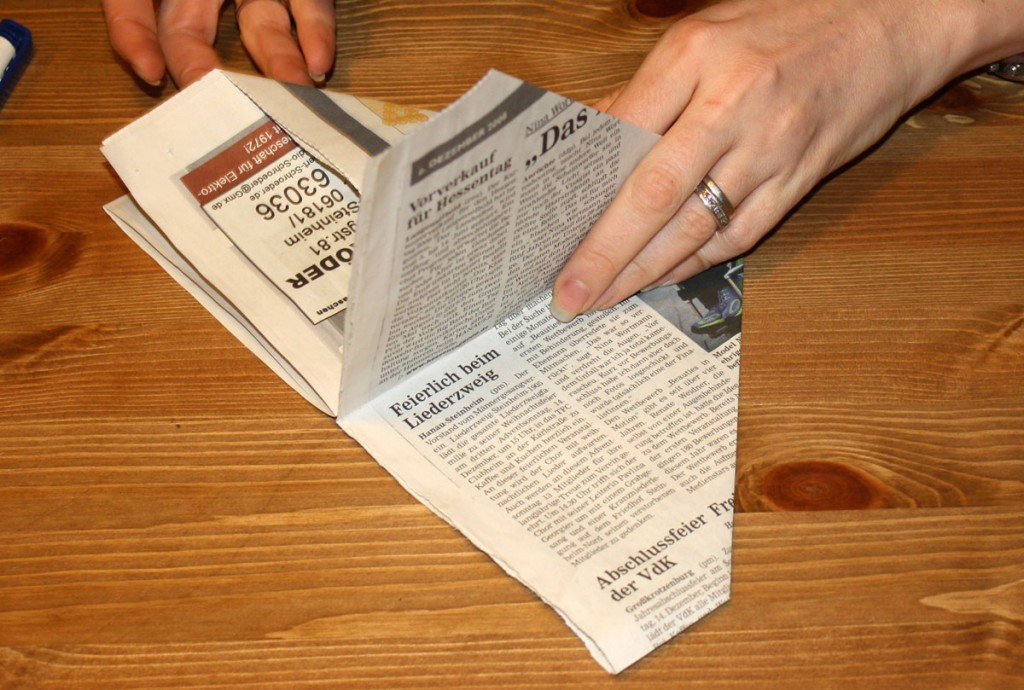
- You should have the flat paper in front of you with no folds visible.
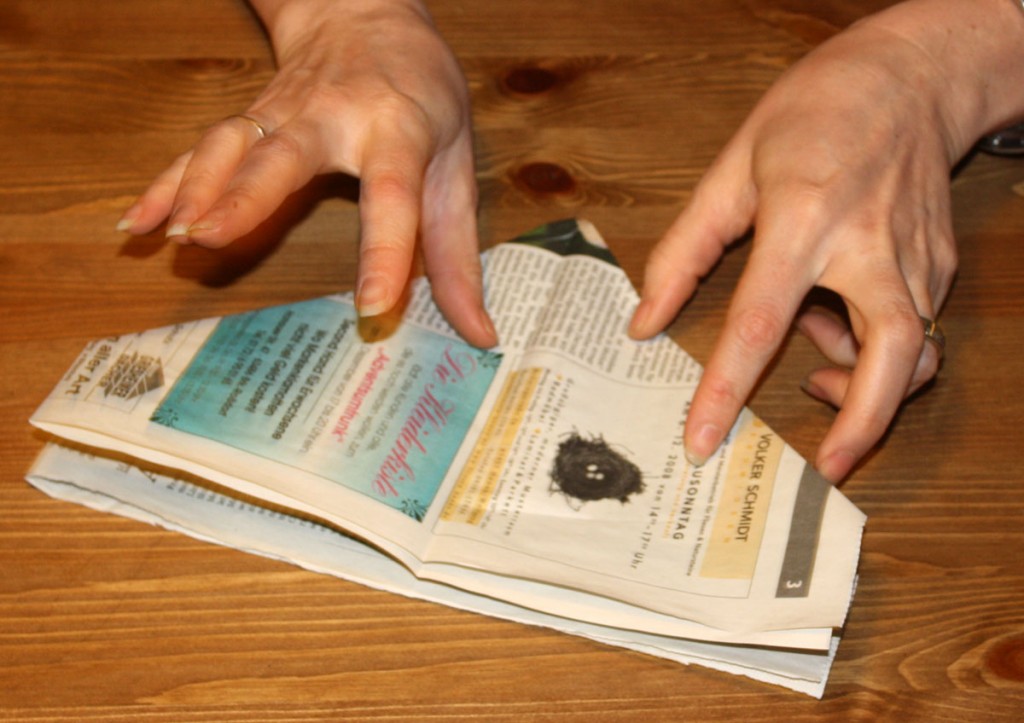
- Now you start folding in a paper airplane fashion. Fold the “wings” to the middle fold…
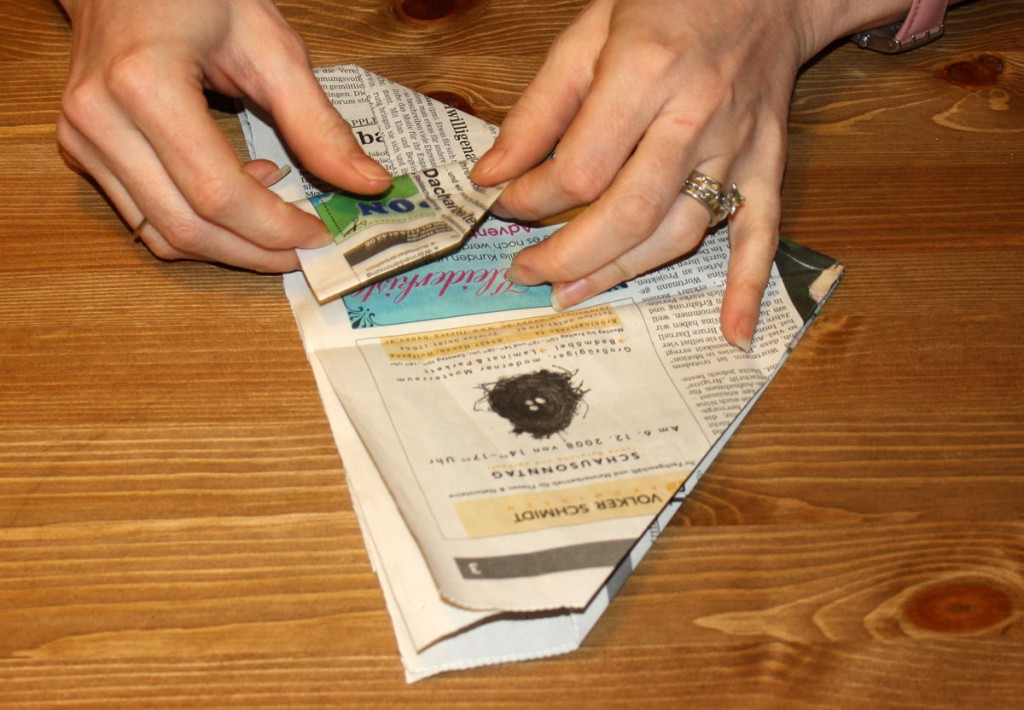
- And in half again.
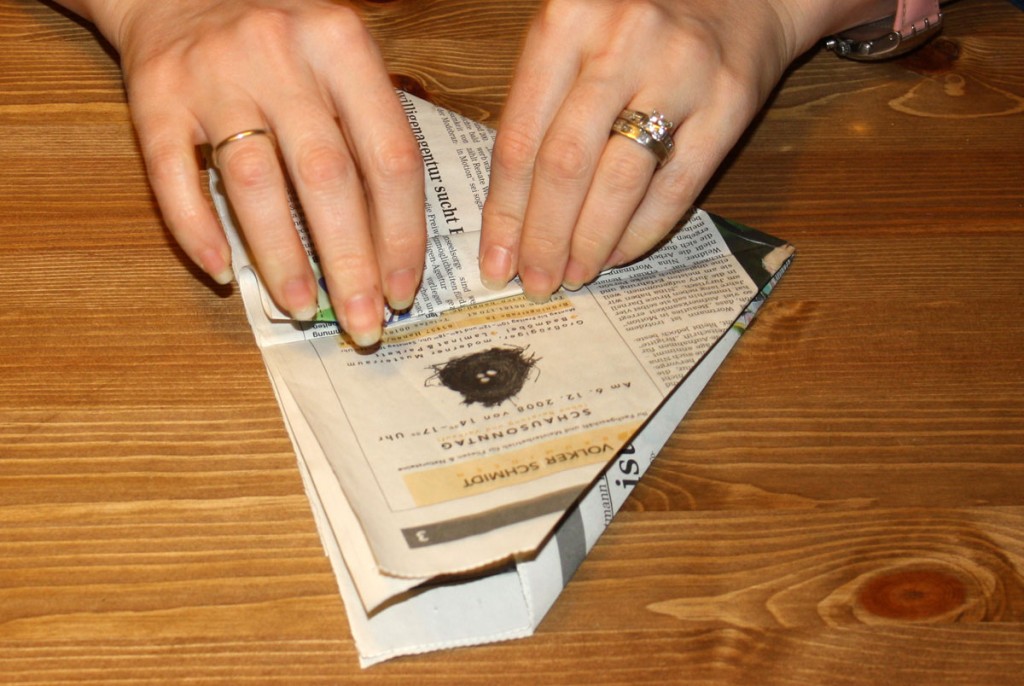
- Rotate the newspaper and repeat the two folds to the middle.
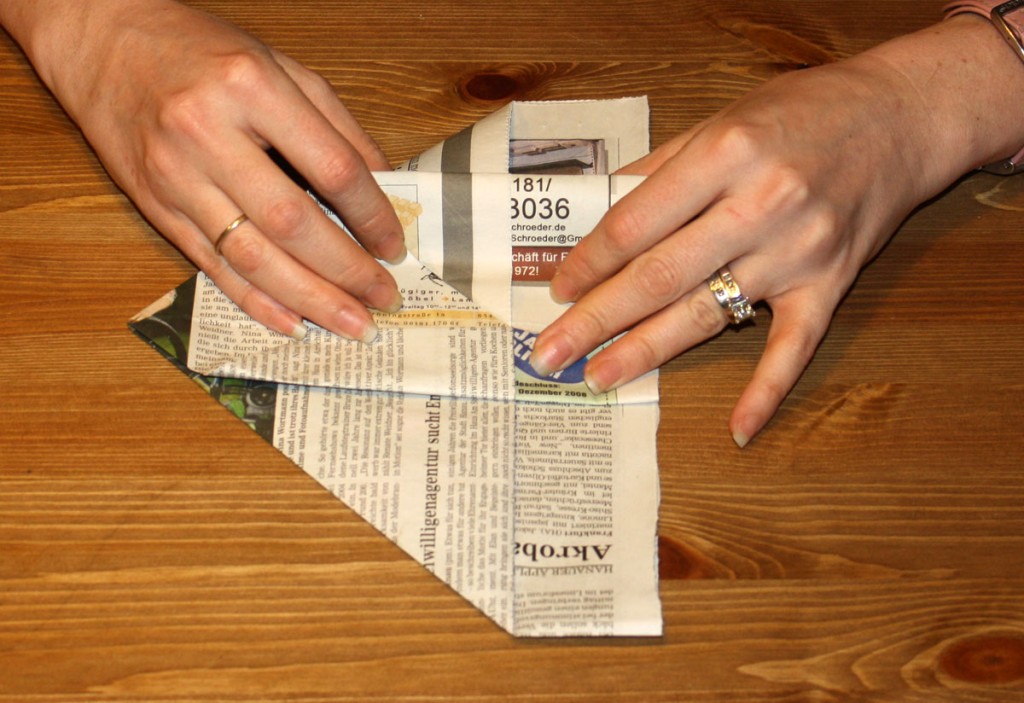
- Flip the paper over and fold the “wings” exactly the same way.
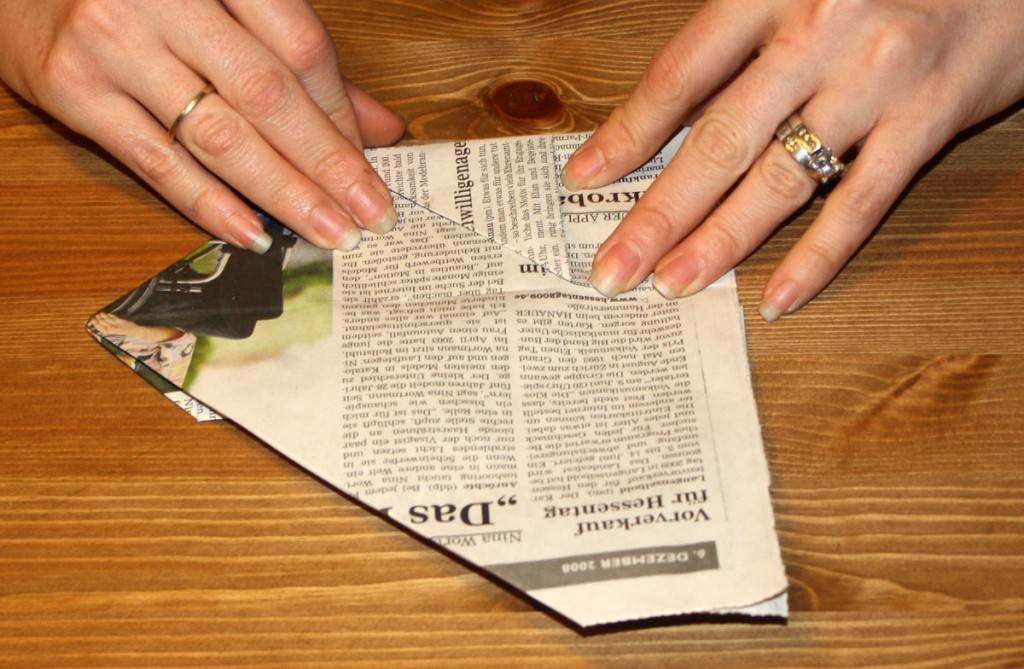
- When all those folds are complete, your newspaper should look like this.
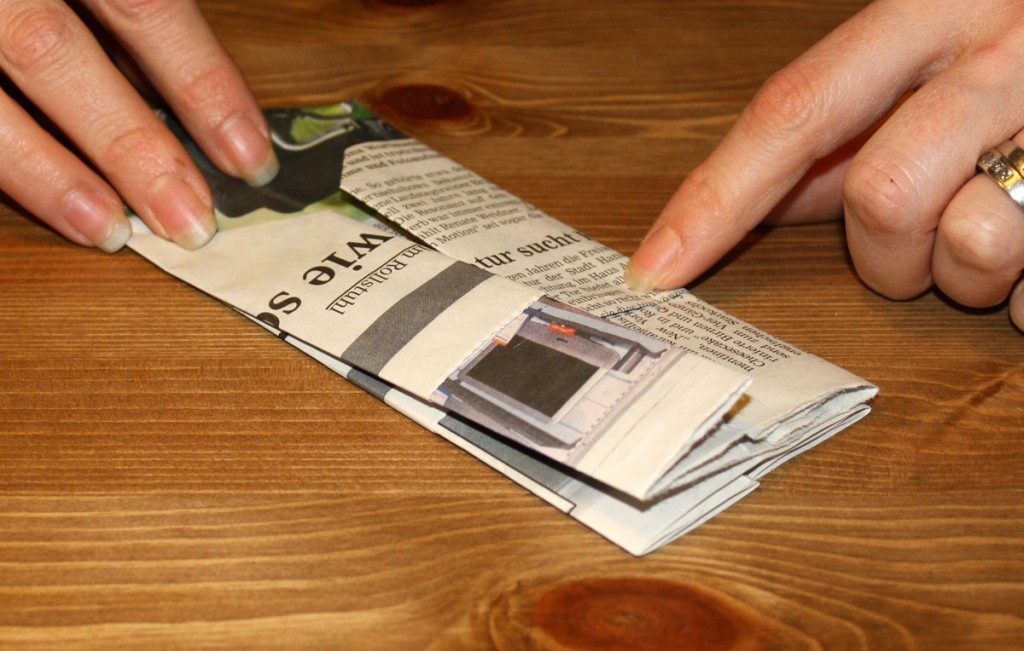
- Fold the sides over the edge of the soon to be pot on both sides.
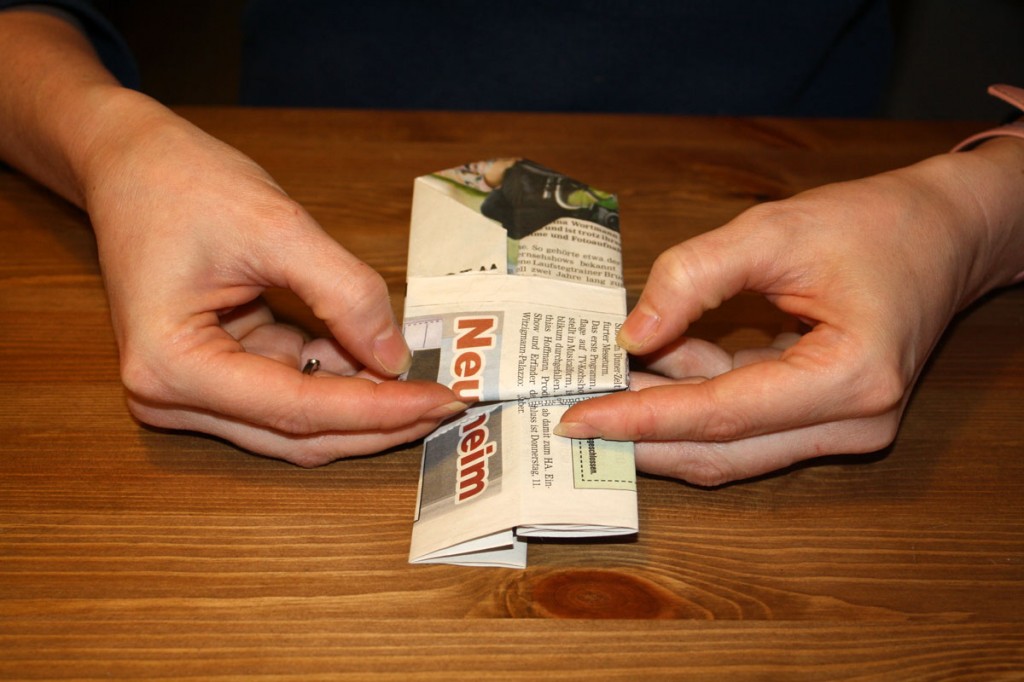
- Then reach inside and pop open your new seedling pot.
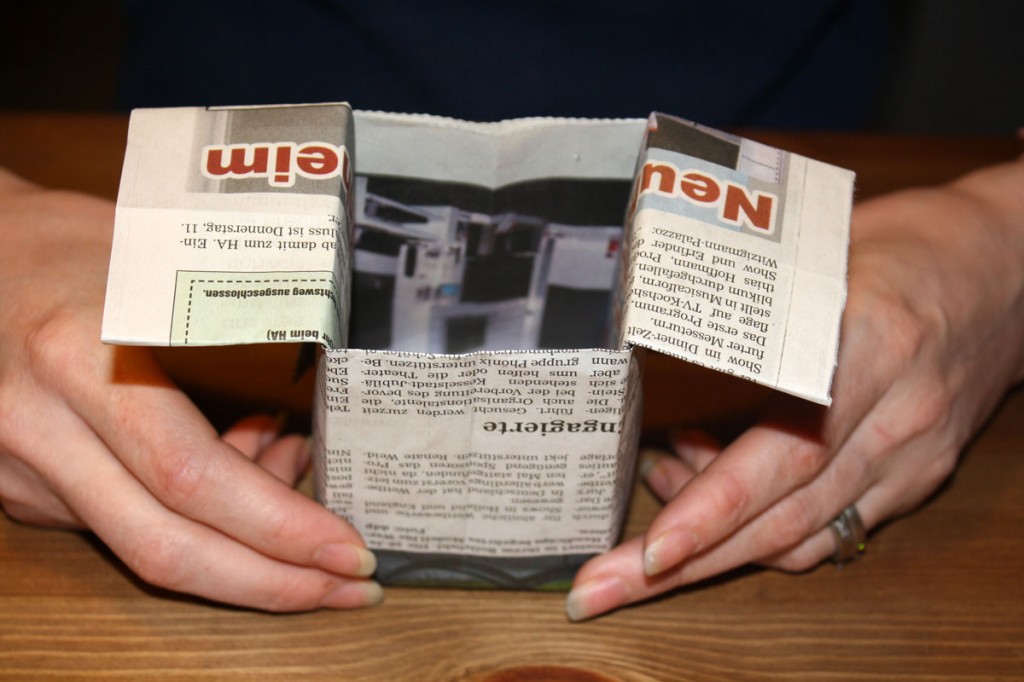
- Now you can fold the wings down into the pot or leave them out. I think they are a bit sturdier inside.
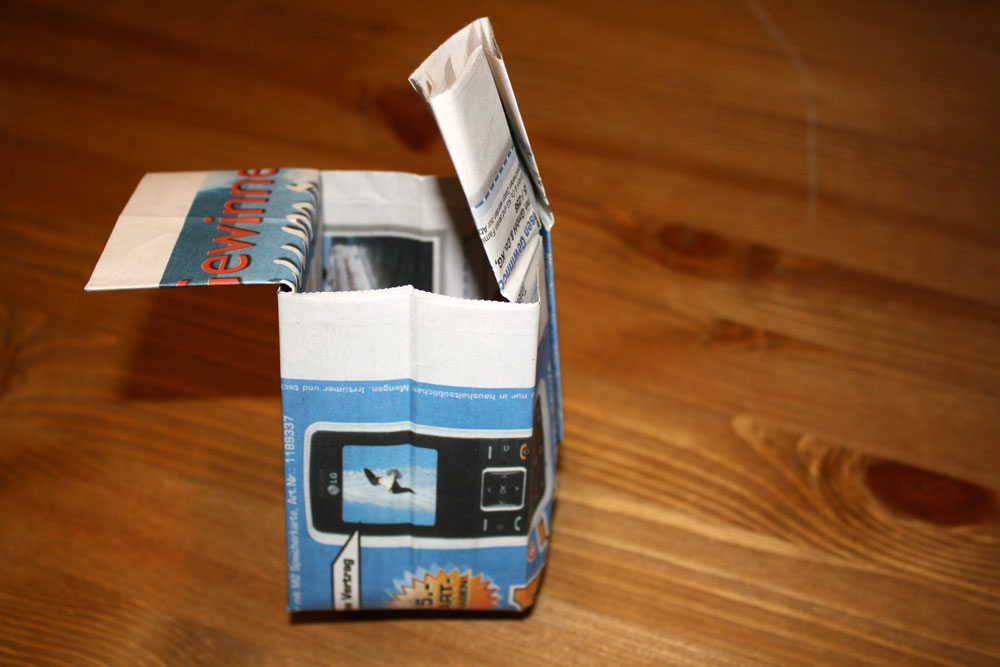
- Do this on both sides and your pot should now look like the photo below, both wings folded in.
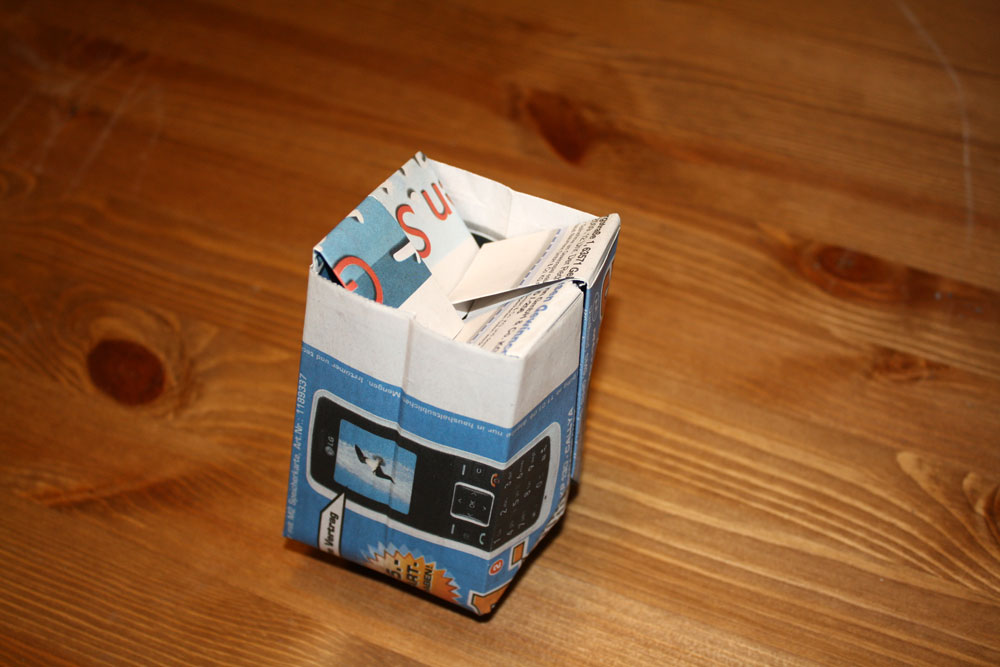
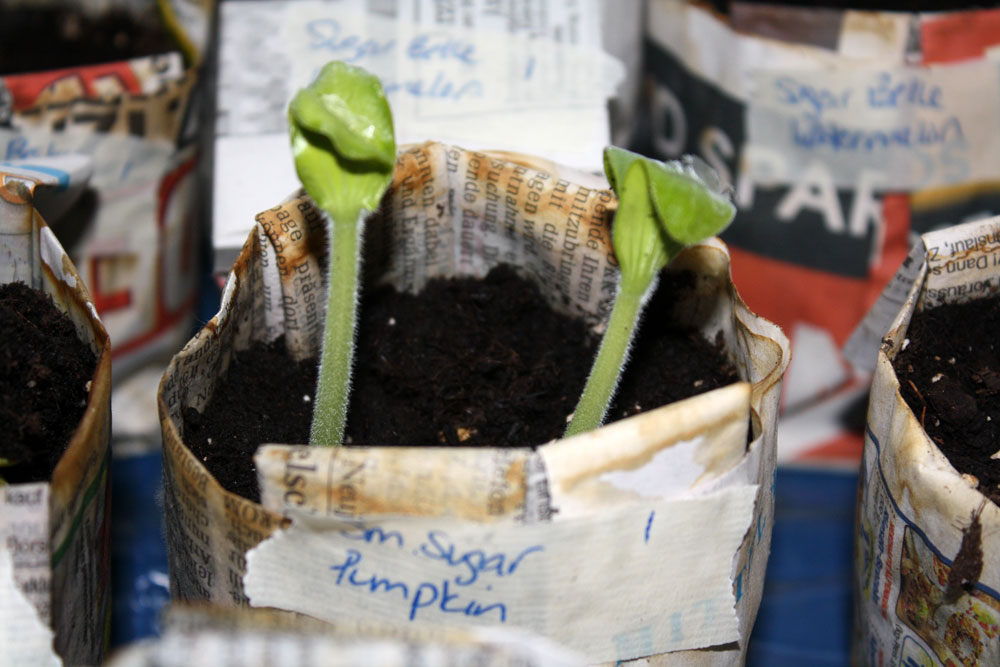
- Then fill up your pot with soil and some compost and you’re ready for planting. In the photo below, you can see the folded wings at the front of the pot, where the label is. We’ve just filled the pot with dirt using our hands, tamped it down so it’s solid and the dirt doesn’t disappear/compact when we start watering and let the seeds go to town!
Find more fun DIY tutorials, crafts and projects at




I like using oragami, great idea. Will try it out. I read your post about your neighbor in the car …kind of unusual for Germany, from what I remember.
Janet
Just saw your vid and am now signed up. I was wondering how you would fold the pot so that the folds are inside…you mentioned that but didn’t show how you could do it. Thanx…can hardly wait to see all you have to offer.
Just me again…I’m blonde [bottle], too!! Don’t seem to be able to see the additional instructions. Cleared history to make sure I wasn’t doing something?? Let me know if I’m having a ‘blonde moment!’ ;o)) cm
Hm, your newspaper must be of slightly different dimensions than mine. When I folded the corners across, everything lined up at the top (square), and I ended up with no flaps to fold at the end. I’m actually quite good at origami (see my origami jewelry atmy etsy site etsy.com/nylonthread), so I assure you it’s not aptitude! I might try trimming the paper so that it’s more narrow or something. I’m sure I’ll figure it out, but my first try failed!
Ok, I took about 3-4 inches off the height of my Washington Post, and I have flaps! Thanks Tiffany!
Interesting. I didn’t imagine the newspapers would be so different over here vs. in the US. But I guess since printing paper is all different, they figured they would make the newpapers different too. Some of our papers are smaller than the rest which makes it nice for bigger or smaller plants accordingly.
Thanks for the heads up. I wonder if it’s just certain papers over there or all of them….hmmm. Maybe we need to start a list! 🙂
Thank you, so much! I tried four times with some other instructions I found on the web. They did not include video and I could not get how to get the paper positioned correctly after folding the corners up. Your video is great!
Wow! Thank you very much! I always wanted to write in my site something like that
Thank you for taking the time to make this tutorial! It took me a few tries but I now have 10 🙂 I used American newspaper and they came out just fine.
Great blog!
Congrats, Katy! It takes a little time to get used to how it works but once you get it down, you’ll be able to do it without really even thinking about it!
Thanks for leaving your kind words and I hope you’ll come back and tell me all about what you’re starting in those pots 🙂
Thanks for the great pattern! I’m using a New York Times paper, and as others have mentioned it does not wind up with enough “flap” when done. If I cut off or fold down 2 to 3 inches from the top of the page it works better, though I still need a small piece of tape to hold the flaps down.
Love the demonstration! I’ve always wanted to learn how to do this. It took me a couple of tries to get the dimensions right; I found the coupon circular from the local grocery store to be just right. Thank you!
So, I know I’m a bit late in getting everything planted, but I wanted to try my hand at this…wow…this is really easy. Thanks for the video! Very helpful! 😉
Hi,
Great idea, my local paper must be a different size than yours. We don’t have a flap at the end. Please give me the lenght and width of your paper
Hi Sharyn, I’ve updated the post to include this info as well but the free newspapers here in Germany have two main sizes and a single half-sheet that I use for folding may have one of the following measurements: 35 x 51cm (about 14 x 20 in) or 40 x 57cm (16 x 22.5in). The majority of the paper is 35×51 but the bigger pieces make slightly larger pots which are great for planting multiple seeds or larger plants like zucchini, pumpkins, squashes, etc. Hope this helps. Folding these can be rather tricky at first but become second nature after a few times.
These are brilliant – thank you for sharing 🙂 I’ve planted up a batch with seeds and won’t go back to bought seed pots again.
Pictures of them are here – http://www.flickr.com/photos/31021769@N03/
.-= Coffee&Cream´s last blog ..Free Pattern – Doll Outfit =-.
Hi, thanks for the tutorial. I’ve read elsewhere that newspaper with black ink only should be used as the color ink is not safe.
Hi Sam,
You definitely don’t want to use colored advertisement slicks when doing this. You know like the ones you get in the Sunday paper from every store in town? But usually one page of general color in regular newspaper sections hasn’t given me any issues. I don’t usually stick the pots in the ground but remove them when I plant things…so I don’t worry so much about it breaking down completely. But I do tend to stay away from the regular flat newspaper pages that are full color on both sides when making my pots.
Thank you for this tips. My sister have a project to make recycled materials to a thing. This can help her.
Thanks so much! This is a very easy to follow tutorial! I will be making lots of these for Spring time planting. 🙂
Hi there,
THanks so much for the great video! It makes it so easy to learn to make these pots. I will be making alot of them in the lead up to spring (I live in Australia so we’re heading into spring). I am also posting about your tutorial on my blog. So, thanks again!! 🙂
Thanks for leaving a comment. I hope you have lots of fun making the pots and that plenty of wonderful plants spring forth in them 🙂 Have a wonderful spring!
Thank you so much for the great video, and idea for making origami pots out of newspaper – so much better than the circular ones, with which I have been having difficulty.
Your version works a treat, and I am off to sow my squash seeds.
Best wishes,
White.
Thank-you for this great idea, I will be teaching my Young Farmers group as we are going to have a container allotment on our farm including a big project to build a greenhouse made of 2ltr plastic drinks bottle
Wow — that sounds like a very cool project with the greenhouse! It’s awesome that you’re doing such a great thing to teach kids how to be more sustainable from early on!
Just what I was looking for. Thanks for sharing!
Thank you for the instructions – it took me a while to understand what is going on, but after a couple of tries I ended up with really nice looking pots.
I have a change that you may want to try. It requires cutting the paper, but results in a more stable pot.
Leave the long side the same length – this defines the size of the pot. But instead of using half a page, cut the whole page so that it is square. I used 16” square to make pots that are 2”x2”
What the extra width gives you is very long tabs at the end. They’re actually as tall as the pot. Instead of folding them in, fold them out. Then, fold the ends under the folds that are in the middle of the side of the pot. This covers the fold so that the pot is more stable.