As the garden season winds down here, it’s time for me to think ahead to next year’s planting. Starting seeds for seedlings will begin in just a few short months which means I better get going on my newspaper pots. But more important will be having seeds themselves. Because without seeds, what would I plant?
I just put together a big order of Burpee seeds again which we’ll be splitting with some friends of ours. I recently found out they are owned by Monsanto and will eventually stop shopping there…but I dig their heirlooms and so I’ve made one last order of everything I like. Hopefully I can save seeds from everything in 2010 so I have seeds for 2011 and so on.
One of the seed saving techniques I perfected this year was saving seeds from tomatoes. Not that it’s hard to do. But in the past, we just never had time to pay attention to whether the seeds were done or not. And I think the instructions we were using were making things harder than they needed to be.
To save tomato seeds, you need a small cup or glass, a bit of water, a knife and, of course, tomatoes with seeds in them. You also probably want to cover the glass or cup with a piece of paper towel and a rubber band to keep flies out. And once you’re ready to wash the seeds, you’ll need a fine wire sieve that the seeds can’t slip through.
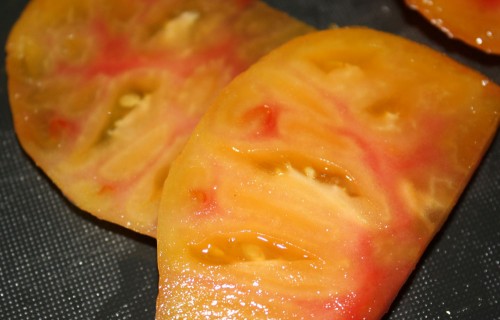
The first thing you need to do is cut open the tomato to reveal the seeds. You can cut the sides off the tomato to show a bunch of the seeds and just scoop them out. Or if you’re cutting up tomatoes for something like a salad or sandwiches, you can save seeds from those slices as well. Tha’s how I’ve ended up getting most of our seeds–I just can’t stand to waste the seeds or the delicious tomatoes! Just try not to take any damaged seeds. But if you do end up with damaged seeds, you’ll notice they’re cut once they’ve dried out and can just discard them then. Whenever possible, take seeds from your biggest, nicest tomatoes so that good genetics will be passed along. Also, if you’re thinking about taking seeds from the tomatoes you bought in the store, they are probably a hybrid variety (unless they’re coming from a farmer’s market) and may not actually grow anything.
Don’t worry if you take a bit of tomato flesh when you’re removing the seeds. You’re going to separate that off of the seeds as they’re sitting in water. And what doesn’t come off after soaking, you’ll wash away in the sieve. Take the seeds you’ve removed from the tomatoes and put them into a glass or cup. I like to use a glass because you can easily see how far along the seeds are but any sort of container will work.
Once the tomatoes are in the glass, add water until the seeds are floating and there is enough room for you to notice the difference between the seeds floating on top and those which may already be resting on the bottom. That will be about an inch of water. The seeds which are floating will probably have more tomato flesh on them still, and the tomato seeds at the bottom of the glass will only have that gooey clear seed covering over them.
Cover the top of the glass with a paper towel and put a rubber band around the rim to hold it in place. This will let air circulate to the tomato seeds while keeping any bugs out. Let the glass sit out on your counter, away from direct sunlight for a 1-3 days. When all the seeds have sunk to the bottom of the glass, you’re ready to go on to the next step. If mold forms on the top, don’t be concerned. This is natural and it will not harm the seeds.
Now you can pour the top layer of gunk from the glass (with any mold and leftover tomato flesh) and pour the seeds into your wire sieve. If you like, you can just pour everything into the sieve and push the unwanted stuff through or scrape it out with your fingers and discard it.
Rub the seeds lightly on the wire sieve to get the remaining clear goo off which has been coating the seeds since they were inside the tomato. (Yes, goo is a technical term.) This process should only take a few seconds as the goo should be fairly well broken down after sitting in the water.
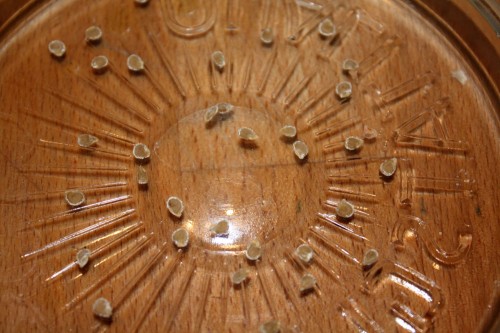
Scoop the seeds out of the sieve with your fingers (you can try dumping them also but most of them will want to stay in the sieve) and put them on a plate or dish where they can dry. The material doesn’t really matter but paper isn’t recommended because the seeds will stick and you’ll end up with papery seeds later on. I usually just set them out on my kitchen counter. When you think about it, stir the seeds a little with your finger so they will separate and not end up glued together, or glued to the dish. If you forget, don’t worry–you can usually gently pry them off the dish and away from each other without damaging the seeds. They generally take a day or two to dry out, depending on how warm it is in the room.
Now your dried seeds are ready to be put into a seed envelope or baggie to be used next year (instructions on folding origami seed envelopes are coming soon). Seeds should be stored away from direct sunlight, in a cool place. They will generally keep a couple years this way. If you have a lot of seeds or just want to save some for a longer period of time, you can put the seeds in the freezer and they will keep indefinitely.
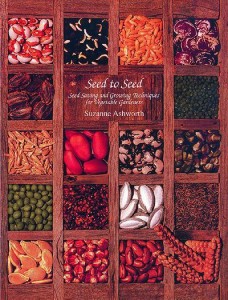
If you want to learn more about saving seeds from what you grow, I recommend Seed to Seed: Seed Saving and Growing Tecniques for Vegetable Growers by Suzanne Ashworth. Check it out on Amazon.com or Amazon.de
. It’s a bit on the technical side but it covers every type of vegetable, fruit and flower imaginable. It’s also published by the Seed Savers Organization which is a great non-profit program which encourages people to learn how to save their own heirloom seeds and provides a network for them to be passed along to others.
This post was featured in 11th Heaven’s Homemaker Monday link-up.


Good for you! Saving tomato seeds is a lot more involved than other seeds I would collect.
Well it may seem like a lot of steps but they are all spaced out over a few days so I never find it to be that complicated or involved. Getting the seeds out of the tomato is usually the worst part. And we love tomatoes here so it’s all worth it.
I treated myself to that book this summer. It’s fantastic, I have so much to learn when it comes to seed-saving but that book is a really good reference to have around.
If we harvest seeds from our garden tomatoes we have several advantages. First of all, we will have seeds for the new season at a low price. But this is not the most important thing. We will have the advantage that the new generation will be more adapted to the soil and the conditions in our garden. And if we take care year by year to save seeds from the most beautiful and healthy tomatoes, we will get more and more beautiful and healthy fruits. Thus, after several years of saving seeds we will have a perfect adapted variety for both our garden and our taste