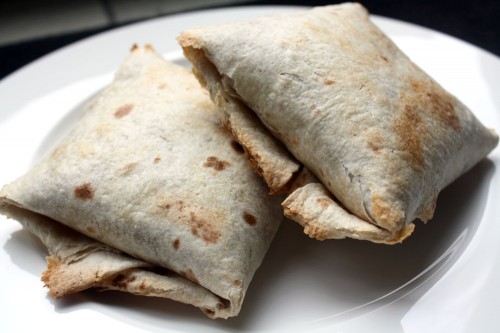
Since I grew up in Texas, I’m a big fan of TexMex food. But finding good TexMex or Mexican food around Frankfurt is next to impossible. We went to a “Mexican” restaurant several years ago and ordered fajitas. What came out was a few strips of beef, carrot slices, broccoli and I seem to recall a few stewed tomatoes as well. I have no clue what Mexican restaurant they ever went to that prepared fajitas with carrots and broccoli, but I was disturbed to say the least…and we never went back there.
In my quest for keeping dinner interesting, I came across a recipe for ground beef chimichangas and thought, “Have I ever even eaten a chimichanga?” I’m pretty sure I must have when I was younger but I can’t recall a specific time. But I did know that they sounded awesome and since Gaylord’s dad is always eating them in Meet the Fockers, that means they must be good!
The following chimichanga recipe is baked instead of fried which not only makes it healthier but also a bit easier in my opinion. I hate the grease popping all over the kitchen and burning yourself with it. When using the oven to firm up your chimichangas, you only need about 10 minutes time…and if you make the filling ahead of time, you have a very simple final step to complete to actually get dinner on the table. I’m sure you can even freeze the filling (perhaps without the cheese) for future nights and you’ll have a super quick and easy dinner ready to thaw.
Don’t forget to remove the toothpicks before you serve these…and if you’re worried that the chimichanga will fall apart–don’t be. When baked or fried properly, they become nice, crispy little pockets of goodness. Although 1/4 cup of filling seems a bit small, you will be pretty surprised at how filling these are. We used 1/3 cup the first night and could barely finish 2 chimichangas each. The second night with only 1/4 cup filling, they were perfect.
I will, without a doubt, be making these chimichangas OFTEN because both Stefan and I loved them. Mackenzie was not too sure about them but she’s been cutting teeth and working on her walking skills, so her interest in new foods is not that high right now. But because there are no chilies in the main ingredients, this is a very kid friendly recipe that can also be spiced up quite a bit at the end if you prefer. You could even throw in some hot sauce or chilies as you are making the pockets but make sure you remember which are which so your kids don’t get a big surprise!
The interesting thing about eating a chimichanga, is that the toppings you put on it at the end can make all the difference. When I decided to make these, I even went out of my way to make homemade picante since you can’t buy real picante or salsa here in Germany. (See above reference about fajitas if you’d like to imagine what salsa is like here.) I couldn’t decide whether I liked the chimichanga best with just sour cream and cheese, or with salsa added to the first two…or all three of those plus shredded lettuce. I guess I’ll just have to make them again keep trying all the options until I decide on a favorite. Or maybe mixing it up each time is part of the fun.
What do you put on your chimichanga?
| Servings |
|
- 1 pound ground beef
- 1 medium onion, chopped
- 2 cloves garlic, crushed
- 1 1/2 cups Cheddar, Mexican blend or other favorite cheese
- 1 (16 ounce) can refried beans
- 1/2 cup picante sauce
- 12 (8-inch) flour tortillas
- Toppings: salsa, sour cream, shredded lettuce, hot sauce, jalapeños, cheese, guacamole
Ingredients
|
|
- Preheat oven to 425°F (210°C).
- Cook beef, onion and garlic in a large skillet over medium-high heat for 8-10 minutes or until beef is no longer pink and stirring until beef crumbles. Remove from heat and drain if needed.
- Stir cheese, beans and picante sauce into beef mixture.
- Using a measuring spoon, place 1/4 cup beef mixture in the center of each tortilla. Fold opposite sides of tortillas over filling, forming rectangles or squares. Secure with wooden toothpicks.
- Place on a baking sheet and bake for about 5 minutes then turn and bake another 5 minutes.
- Remove toothpicks and serve immediately with favorite toppings.


