The best and healthiest apple cider vinegar is one that is organic, unfiltered and unpasteurized. There are some areas around the world where really good apple cider vinegar may be hard to come by. In fact, here in Germany it was really difficult to locate the first few years we lived here. But meanwhile, it’s available in most grocery stores and bio supermarkets but usually not at the low prices you usually find in the US — which makes it very unpractical for canning or using in large quantities.
There are several different methods that you can follow when making apple cider vinegar, depending on what type of apple bits you are starting with. But lucky for all of us, apple cider vinegar is easy to make as well as inexpensive. The biggest thing that you need is patience, because fermentation can take some time.
Apple cider vinegar can be used in many different ways. If you can do some research you will discover that it can be used not only in the kitchen but elsewhere. Here’s a tip though, it is better not to use your vinegar in foods that are to be canned or stored at room temperature because of varying acidity. However, it is great to use with salads, cooking or freezer and refrigerator pickled products.
P.S. Use this link to see this in a print-friendly version — normally I would use a different format to make it print friendly, but with all the different methods, it just becomes a major mess!
Method 1 — Use Fresh Pressed Apple Cider
Using fresh pressed apple cider to make apple cider vinegar is probably the easiest of all the methods because you barely have to do anything at all. By the way, you still have just enough time to do this and give it as a homemade Christmas gift! 😉
Materials and Ingredients:
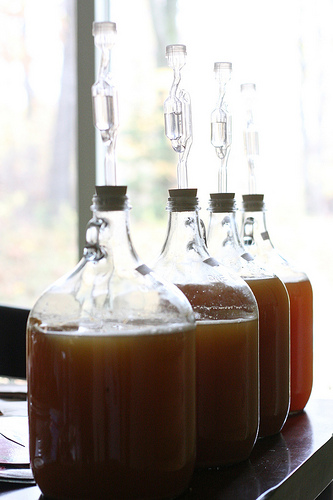
- A large jar with a wide mouth/opening or a wine balloon
- Fermentation bell / air trap for top of jar or something to close off the jar without totally restricting airflow (you want the vapors to be able to escape from your jar as the juice ferments)
- Vinegar mother (if desired)
- Apple cider
Pour your apple cider into a large jug and add vinegar mother, if desired. (The cider will usually begin to ferment on its own after a week or so, but if you use mother the process will be sped up and you’ll have a better chance of ending up with a good vinegar in the end.)
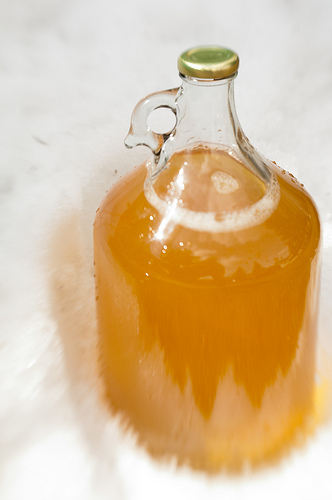
Let it sit for 4-6 weeks, do a taste test and see if the flavor is to your liking. If it is, you’re ready to bottle it.

photo credit: Chiot’s Run via photopin cc
Method 2 – Use of Scraps (Cores and Apple Peels)
Some people prefer to use this method mostly because they get to eat the apples at the same time make vinegar too. This also is a faster method compared to the second one, taking only two months to complete the entire process. You can actually use other types of fruit scraps aside from apples and get similar results.
Materials and Ingredients:
- A large bowl or a jar with a wide mouth/opening
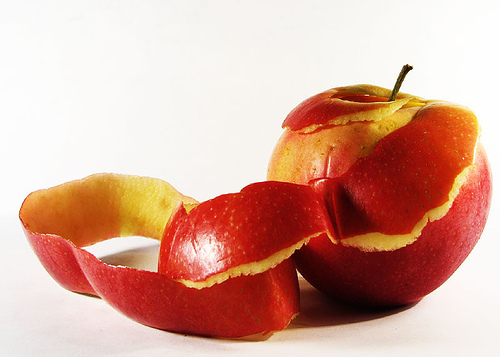
- Apple scraps (the cores and peels from organic apples are perfect)
- A piece of cheesecloth that you will use to cover up the jar so no debris or flies can get inside
- 3 parts water
- 1 part sweetener (sugar, honey, etc)
Leave the scraps to dry. You will notice them turning brown and you need not to worry because that is what’s supposed to happen. You can start by adding the scraps into the jar then top it up with water. You may continue adding scraps throughout the process as you have them. Just make sure, though, that there is enough space in your container if you plan to keep adding to it. Not only do you need a larger container, but you also want to make sure you don’t fill the container with water or it will overflow as you add to it.
Once done, you can cover up the container with the cheesecloth. Make sure that you secure the cloth properly. Store the jar in a dark and warm storage space. A water heater closet or space near a radiator would be perfect for this.
You will notice that the contents will start to thicken in a few days and you will see grayish scum forming at the top. When this happens, do not add any more scraps and leave the jar for a month to allow it to ferment.
After a period of one month, you may taste-test your preparation. If you feel that it is strong enough for you, you can already strain out the scraps from the container so all that’s left is the vinegar, which you can now transfer into bottles.
Sometimes, the product will appear cloudy with sediments from the apples but that is okay. However, if you do not like it appearing cloudy, you can strain the liquid through a coffee filter to take out the sediment.
Method 3 – Use of Whole Apples
This method uses whole apples and takes about 7 months to allow the preparation to ferment into its vinegar form.
Materials and Ingredients:
- 10 whole apples (preferably organic)
- A glass bowl
- A larger glass bowl
- A piece of cheesecloth to cover your bowls and protect it from debris, flies and other sediment
Start by washing the apples to remove dirt and chemicals. Cut the apples into quarters. You can core and peel the apples if you want but that is optional. If you do, you can use the core and peels to make vinegar by way of method one.
Let the apples air until they turn brown, then transfer them into a smaller bowl and add water to cover.
Cover the bowl with the use of the cheesecloth and leave in a warm and dark place for 6 months. Ideally, a hot water cupboard is the best place to store your preparation.
When 6 months passes, you will see grayish scum forming at the surface of the liquid. It is normal to see that. All you need to do is filter the preparation through a coffee filter into a larger bowl. Cover the larger bowl like you did with the smaller one and leave for another 4-6 weeks.
Now that is done and you have your homemade apple cider vinegar!
Featured Posts from Last Week’s Natural Life Linky
Ready to detox for winter? Why not make your own herbal detox with dandelion, red raspberry leaf or alfalfa herb. Deep Roots as Home is sharing how!
Got too many grapefruits on your hands? Homegrown and Healthy is telling you how to turn it into a super cleaning solution for your floors or otherwise!
Be sure to check out the other links in the list from last week also! Trust me, you want to! It was a great collection this week!! Thanks to everyone who linked up!
Want to join in the fun and link to your own blog? You can share about anything related to natural living, from gardening to recipes to home remedies to anything else related to natural living.
Here’s how this works:
PLEASE READ THESE GUIDELINES, especially if you have never linked up before!
Posts you might want to link up could include:
- Green & natural living
- Real Food recipes
- Repurposing & upcycling ideas and projects
- Home remedies & aromatherapy
- Gardening goodness
- Sustainable smartness
- And other things related to living a more natural life
Here’s how this works:
- You are free to join the Natural Living link up at any time. You can also skip a few weeks and then come back. It’s entirely up to you.
- Please do not share more than 2 links per Link-up. If you do, I will delete the “extras.”
- Please link directly to the specific post on your blog that relates to green living — not your main blog URL.
- Please only link to your own blog or photos hosted online.
- Link back to No Ordinary Homestead or the Natural Living link up post in your blog post. This way, if someone else wants to join the fun, they can. You can either link with text or using the Natural Living badge. Below is a code for the badge above – feel free to resize it as you need. Just copy and paste this code into your post or save and upload the image to your blog: <a href=”https://www.noordinaryhomestead.com/category/natural-living/natural-living-link-up/“><img title=”natural living link up″ src=”https://www.noordinaryhomestead.com/wp-content/uploads/2012/08/noh-natural-living-linky.jpg” alt=”natural living link up” width=”300″ /></a>
- I highly encourage you to visit other participants and leave comments. This is a great way to meet new friends and become inspired about your garden! I try to visit all the blogs participating as well every week

That’s it! Share your green ideas with us by linking up at the bottom of this week’s Natural Living post!
That’s it! Share your garden with us by linking up below!


Thanks for the tutorial! We used to make apple cider vinegar when I was a kid, but I haven’t done it myself. I think I’d like to try it now that I’ve read your post 🙂
It’s really one of those do it and forget it kind of things. I’m really glad we finally tried it out. 🙂
On method number 2…how long do I leave my apples to dry before putting them in the water?
Have you found it in Germany or is this simply Apfelessig? I’ve been looking for it as well!
Hi Kait,
As far as I can tell, they are pretty much the same thing 🙂
We used regular refined sugar to sweeten it but you can use any sort of sweetener you prefer. You’ll just need to adjust accordingly if you use something like stevia because it is much sweeter than sugar.
I started the ACV process using 7 whole apples. Mistake was instead of cutting just in quarter each, I cut into about 8 pieces per apple. Problem with that was that some of the apples on top were floating. I added 2tbsp of honey and covered with a cheese cloth and used a rubber band to keep in place. It’s going to 2 weeks now, and when I checked it out some of the apples especially those floating have turned real brown. No moulds though and it sure smells okay and tastes slightly ferments. Seeing some turned brown, I thought it was probably because they were floating. So, I’ve transferred into a narrower glass jar and I made sure nothing is sticking out now. Do you think I’ll still have the real thing?
Actually, I’ve been reading that you should just use organic sugar and not stevia or honey, as both of those will retard the mother culture. (kind of like when making kombucha) There shouldn’t be much if any sugar left when it’s done fermenting because the sugar is the food source of the yeast :]