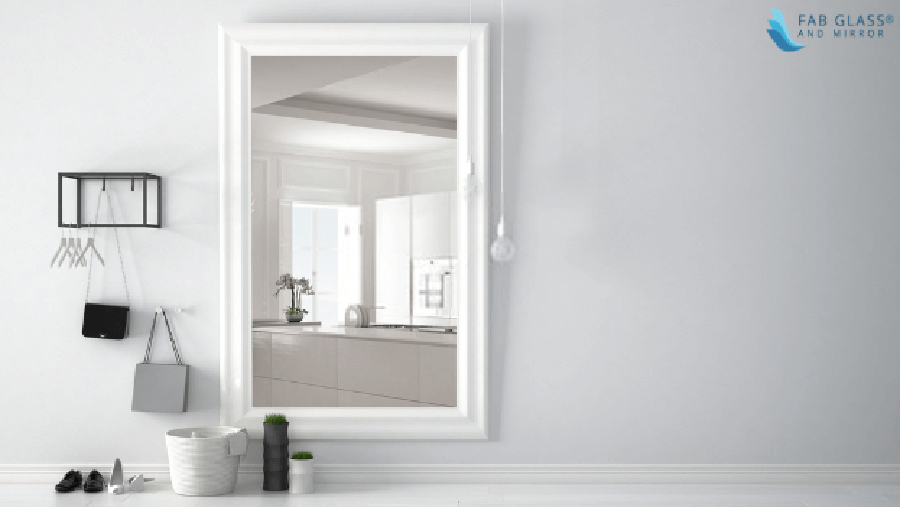
Wall mirrors can be an excellent addition to any area, especially if it has extra space on one of its walls. You can find almost all types sizes and shapes of mirrors for sale on the internet. A wall mirror balances the aesthetics of a place which otherwise seems a little incomplete. But when it comes to installing one; therein lies the catch. Through this guide, we’ll cover all the bases and you will be hanging wall mirrors like a maestro in no time.
Getting Ready
Hanging wall mirrors, especially big ones, can be a daunting task, if you haven’t prepared for it. There are some preliminary measures we need to take into account before putting on our worker hat.
Firstly, analyze the place on the wall where you will hang the mirror itself. Is there enough room on the wall? Should it be placed vertically or horizontally? If placing it vertically, then you need to make sure you align it so your head is easily visible. What’s the point of installing one if you can’t use it to comb your hair? Once you have the dimensions in mind, it’s time to fetch the tools required for the job. Ideally, you would need:
- Hanging Screws/ Cleats/Adhesive
- An electric drill
- Wire (in case of hanging screws)
- Cleaning/Polishing supplies
Note: Before you start measuring, it is always a good idea to get a good sense of how heavy your wall mirror is. If it proves difficult to lift, you may want to seek the assistance of another person. The more the merrier.
Steps to Hang a Wall Mirror
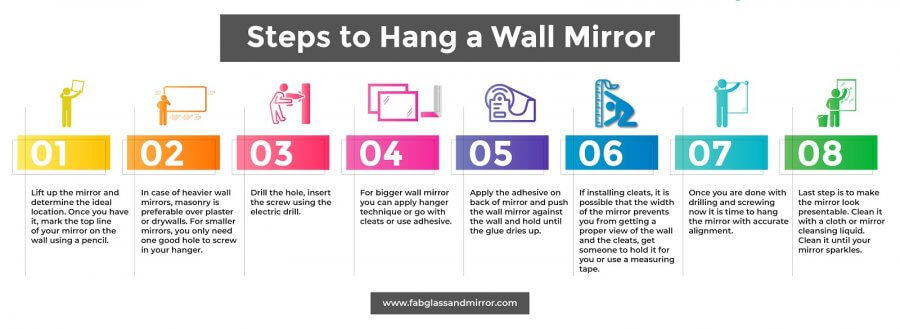
1. Laying the blueprints.

Coming back to the dimensions and orientation you decided for your wall mirror. Lift it up and determine the ideal location. Once you have it, mark the top line of your mirror on the wall using a pencil or any other easily erasable/removable substance. Also chalk out the positions for your hangers. An important thing to note here is that remember to mark positions for your hanger – not the screws. Another point of note is to take into consideration, the type of wall you’re planning to hang it on. Usually, it isn’t problematic. However, in the case of heavier wall mirrors, masonry is preferable over plaster or drywalls. The type of wall will also affect the type of screws you need to buy for the job. Once you have the markings down, move on to step 2.
2. Drilling Holes
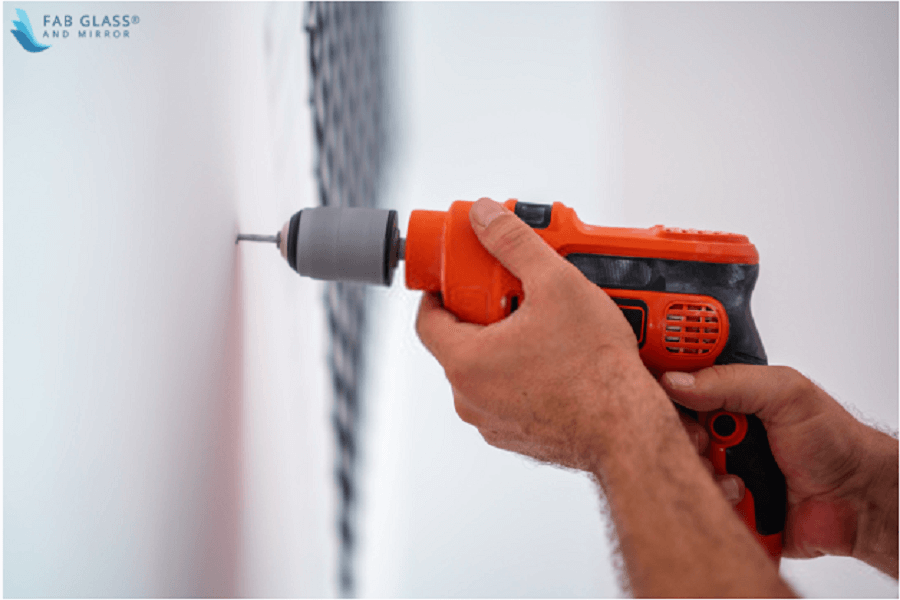
For smaller mirrors, you only need one good hole to screw in your hanger. Have you remembered the pencil line you etched in step 1? Mark the middle spot on that line. That’s your target. Hanger wires are excellent for smaller mirrors. Drill the hole, insert the screw using the electric drill (you may want to nail it on a stud but this isn’t a reason for concern since hangers are generally adequately strong), hold the wire from the center and mark the alignments on the wall before the next step.
3. Apply Adhesive/ Hanger
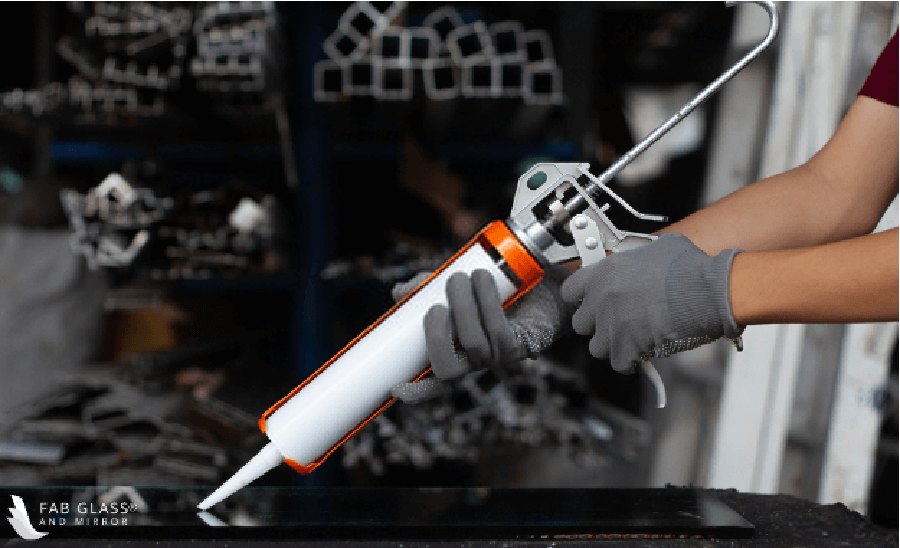
For bigger wall mirrors, you can apply the same hanger technique, go with cleats or use adhesives.
Adhesives are only appropriate if you’re using border less wall mirrors. These types of mirrors generally go well in bathrooms, so it is extremely essential that the adhesive you use is resistant to high humidity. Check with your hardware stores and determine which adhesive would work best in holding wall and glass together. After sourcing the adhesive, one should exercise caution in marking the wall and applying glue for once applied, you will NOT get a chance to readjust it. Take your time, make sure your measurements are precise and then apply the adhesive. Push the wall mirror against the wall and hold in place until the glue dries up. Take turns with your partner if you have one. Glue dries up fairly quickly but check the instructions just to be sure.
Cleats generally follow the hanger technique discussed earlier for the most part. Unless you want a wall full of holes, it is essential to get the measurements for the installation of your cleats right. If the width of the wall mirror prevents you from getting a proper view of the wall and the cleats, get someone to hold it for you or use a measuring tape. The markings should already be there on the wall for all cleats before you start drilling them into the wall.
4. Hanging the mirror.
Once you’re done measuring and drilling and screwing and making other loud noises, it is time to hang the mirror. This part doesn’t require any explanation but do make sure that the mirror aligns properly with the markings you made on the wall.

All that’s left to do now is to make the mirror look presentable. Clean it with a soft cloth and a glass-cleansing liquid if you have one. They are available quite easily in any general store or supermarket. Go crazy until your mirror sparkles. Put away your tools, step back, and admire your work.
5. Cleaning up.

All that’s left to do now is to make the mirror look presentable. Clean it with a soft cloth and a glass-cleansing liquid if you have one. They are available quite easily in any general store or supermarket. Go crazy until your mirror sparkles. Put away your tools, step back, and admire your work.
