To me, Thanksgiving is not officially Thanksgiving without pumpkin pie.
There were several years here in Germany that we just let Thanksgiving day slip by, cooking something traditionally American for the day, but not really going to all the trouble. And a few times, we managed to get invited to someone else’s Thanksgiving Day celebration which was great. But once we moved into our farmhouse, we decided it was time to be adults and start hosting our own Turkey Day soiree
Now it might sound funny, but in order to achieve pumpkin pie in Germany, we actually brought back cans of Libby’s pumpkin puree whenever we visited and even had friends mail them to us from time-to-time. I didn’t notice until about 2 years ago that Germans do sell canned pumpkin here. It’s just in chunks which I never really anticipated. Whether or not it tastes like Libby’s, I will probably never know.
Because this year, I took the big plunge and actually made my very own pumpkin puree. And I honestly cannot wait to see how the pies turn out.
Am I nervous about it? Most definitely!
But everything else I’ve made from scratch has tasted way better than the convenience food version — so I have little doubt that this will go the same way. After all, Libby’s pure pumpkin puree is merely that. So what could possibly go wrong? 😉

This year, I grew some fabulous little pumpkins in our courtyard garden. These are something like a Baby Bear — simply described on the card when I bought the seedling as mini-pumpkins which grow to be about the size of tennis balls (although they were more like large softballs or a kid’s soccer ball) which are fantastic for pies. Needless to say, that sounded good to me!
By the way, the following process also works great for red kuri or hokkaido (very round, reddish pumpkins) which have a fantastic sweet taste. I tried this out on them first and I seriously was eating the roasted pumpkin pieces by the handful before I could get it pureed. A nice thing about them is that you don’ t have to peel the hokkaido because the skin gets very soft and edible. So you can just puree up the whole thing. But I’m not sure it would work well for pies since a traditional pumpkin puree for pies isn’t sweet on its own. So I suppose I will have to try that as a soup or maybe some pumpkin bread!
Basically, if you want to make your own pumpkin puree, you need to crack open the pumpkins (which is why small pumpkins are often better for this since they are easier to cut that the huge ones)…

scrape out the guts (don’t throw it all away though)…

cut the halves into smaller slices…

roast the pieces in the oven…

get them nice and lightly browned (about 45 minutes cooking time)…

peel the pumpkin pieces…

cut it up and puree/mash/etc…

and you’re good to go.
Looks simple enough, right? Why didn’t I do this before??
Here are the details:
Homemade Pumpkin Purée
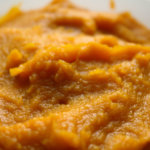
Easy, and a fun fall activity to do with kids. Make it ahead and freeze for longer storage.
Ingredients
- 2-3 small pumpkins
- A few tablespoons water, as needed
Instructions
- Preheat oven to 350°F (180°C).
- Cut the pumpkins in half with a large knife — stick the tip in, work it around, then pry open and pop off the stem.
- Scoop out seeds and pulp into a small bowl (save the seeds for roasting). No need to get every string.
- Place pumpkin pieces on a baking tray (face up or down) and roast about 45 minutes, until a fork goes in easily and they look golden.
- Cool about 5 minutes, then peel each piece and collect the flesh in a bowl or food processor, breaking it into 1–2 inch chunks.
- Purée until smooth, adding water 2–3 teaspoons at a time if needed. A food processor, blender, potato masher or food mill all work.
- Keep puréeing the remaining pieces until it’s all done.
- Use right away, refrigerate for a couple of days, or freeze: put about 1 cup in a zip-top bag, seal almost closed and press flat.